Welcome to the Moda Website!
Inside Outside Quilt
Inside Outside Quilt
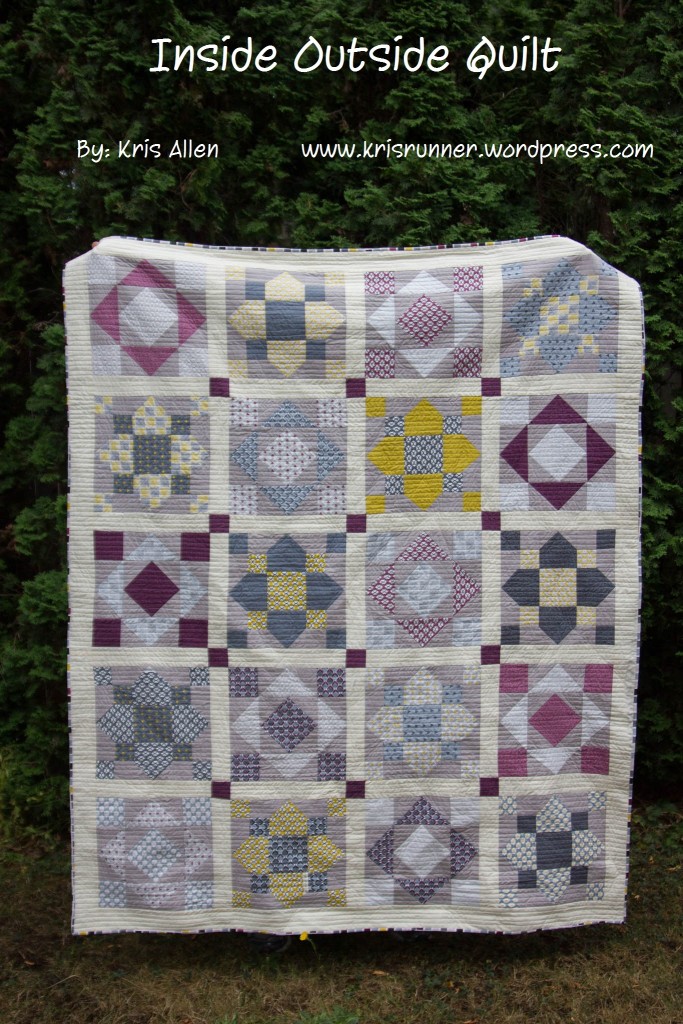
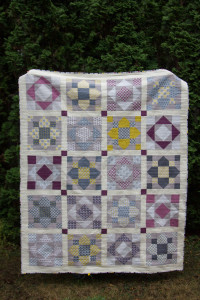
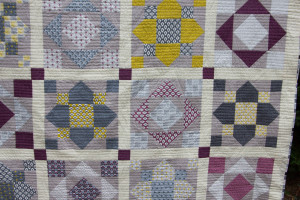
I am excited to share my new quilt with you all. I love combing traditional blocks and use modern fabrics to make an all new look. Loved the look of Chic Neutral and couldn't wait to try it out on this pattern. I had made this quilt using Red/White and Blue (see on my blog) and wanted to see what it would look like with a modern twist. Loved how it turned out and hope that you are able to visualize your favorite material in this quilt.
Color choice ideas:
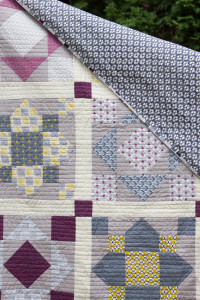
This quilt is made using two blocks. I choose to make one of the blocks from the Eggplant materials with light grey. The second block was made out of the yellow and dark grey (black was too dark - trust me I made two blocks and ended up not using them). You will be making each block 10 times (12 1/2” x 12 1/2” finished) for a total of 20 blocks. You can choose to make your blocks as similar or as scrappy as you’d like.
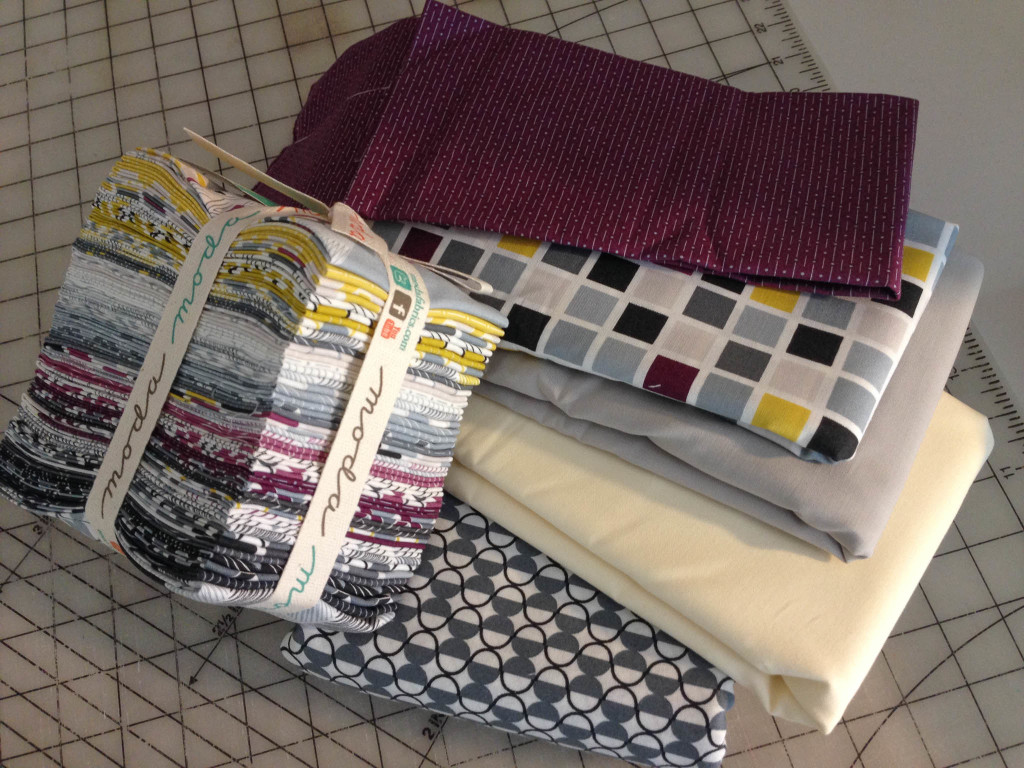
- One Fat Eighth Bundle - Chic Neutral by Amy Ellis
- Snow Bella Solid - 1 3/4 yards (sashing and border)
- Grey Bella Solid (grey 9900 83) - 1 3/4 yards (background for blocks)
- Eggplant with small dashes and dots (eggplant 3514 20) - 1/8 yard (cornerstones)
- Grid with eggplant, yellow and grey colors (eggplant 3511 12) - 3/4 yard (binding)
- Graphite design(graphite 3513 14) - 4 yards (backing)
- All seams are 1/4" seams.
- WOF means width of fabric
Cutting Instructions for Block One (the block I did in yellow):
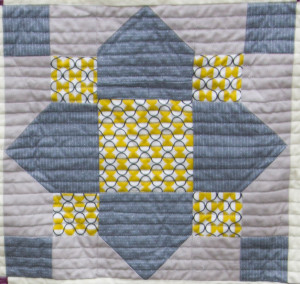
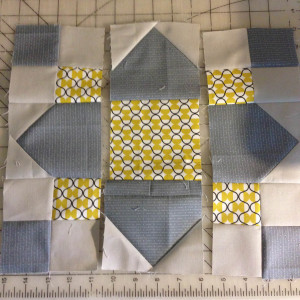
I choose to make half the blocks (5) with the yellow in the A position and dark grey pattern in the B position and solid grey as the background and half the blocks (5) with the yellow in the B position and dark grey pattern in the A position and solid grey as the background. Yellow in B position is shown above. Look at the quilt picture at the top to see what yellow looks like in position A.
You need to make (10) Block One - for each block you need the following: (you will need to cut 10 sets)
Material A
- (1) 10" x 2 1/2" rectangle (10 total for all 10 blocks)
- (1) 4 1/2" x 4 1/2" square (10 total for all 10 blocks)
Material B
- (1) 10" x 2 1/2" rectangle (10 total for all 10 blocks)
- (4) 4 1/2" x 4 1/2" square (40 total for all 10 blocks)
Background Material
- (2) 10" x 2 1/2" rectangle (20 total for all 10 blocks)
- (8) 2 1/2" x 2 1/2" square (80 total for all 10 blocks)
Cutting Instructions for Block Two (the block I did in Eggplant):
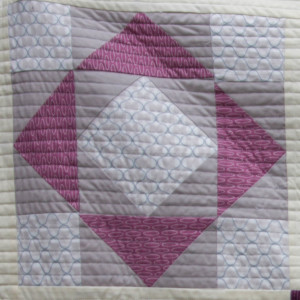
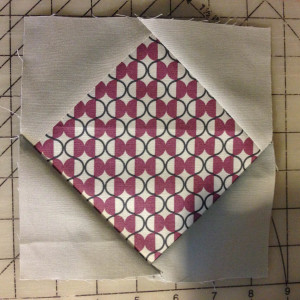
I choose to make half the blocks (5) with the Eggplant in the A position and light grey pattern in the B position and solid grey as the background and half the blocks (5) with the Eggplant in the B position and light grey pattern in the A position and solid grey as the background. Eggplant in position B is shown above. Look at the quilt picture at the top to see what I mean.
You need to make (10) Block Two - for each block you need the following: (you will need to cut 10 sets)
Material A
- (4) 3 1/2" x 3 1/2" square (40 total for all 10 blocks)
- (1) 6 1/2" x 6 1/2" square (10 total for all 10 blocks)
Material B
- (1) 7 1/2" x 7 1/2" square (10 total for all 10 blocks)
Background Material
- (4) 3 /12" x 3 1/2" square (40 for all 10 blocks)
- (1) 9" x 9" square (10 for all 10 blocks)
Cutting instructions for sashing, cornerstones and borders:
Sashing
- cut (11) 2 1/2" x WOF
- Subcut into (31) 2 1/2" X 12 1/2" rectangles
Cornerstones
- Cut (1) 2 1/2" x WOF
- Subcut into (15) 2 1/2" x 2 1/2" squares
Borders
- Cut (7) 3" x WOF
Sewing Instruction for Block One:
Step One: You will take your 10" X 2 1/2" rectangle of yellow and sew it to the background color. Press open.
Step Two: You will take your 10" x 2 1/2" rectangle of dark grey and sew it to the background color. Press open.
Step Three: Cut each of your strips of yellow/background and grey/background into (4) 2 1/2" X 4 1/2" rectangles. Press open.
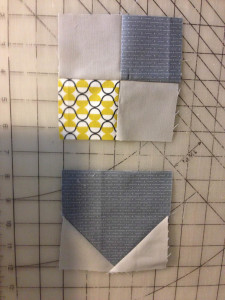
Step Four: Sew a rectangle with yellow to a rectangle with grey (colors opposite from each other). Repeat 3 times for a total of 4 squares. Press open. See picture below top image.
Step Five: To make the bottom image in the picture above. Use a pencil and draw a line from one corner to another diagonally of the 2 1/2' x 2 1/2" background squares. Repeat 7 times.
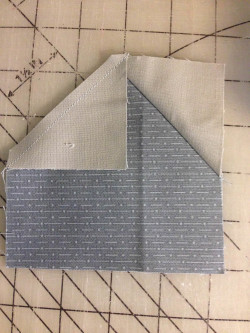
Step Six: Take your grey 4 1/2" x 4 1/2" square and sew a 2 1/2" x 2 1/2" background square to the upper corner along the pencil line you drew. Repeat with your other 3 grey squares.
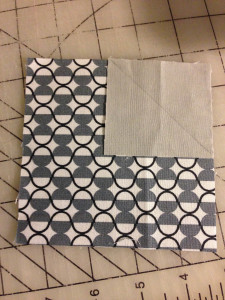
Step Seven: Trim 1/4" to the right of the line and press open. Repeat with your other three 3 grey squares.
Step Eight: Take your grey 4 1/2" x 4 1/2" square and sew a 2 1/2" x 2 1/2" background square to the opposite corner along the pencil line you drew. Repeat with your other 3 squares. Press open.
Step Nine: Take one of your 4 squares blocks and sew it to one of the grey with background colors corners blocks. Make sure the opposite color is next to the grey. See picture of block for an example. Do this another time. Press open.
Step Ten: Take one of your grey with background colors corner blocks to the 4 1/2" x 4 1/2" yellow squares. Press open.
Step Eleven: Repeat Step Nine and Ten to the opposite side of the center block. See picture below. Press open.
Step Twelve: Sew the block together matching corners. Press open.
Step Thirteen: Repeat process 9 more times for a total of (10) Block One.
Sewing Instruction for Block Two:
Step One: Take a background color square 3 1/2" x 3 1/2" and draw a diagonal line from corners. Repeat 3 on three more background squares.
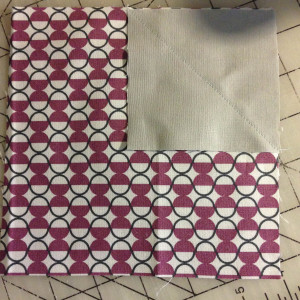
Step Two: Sew the background square (3 1/2" x 3 1/2") to the top corner of your grey (or Eggplant) square 6 1/2" x 6 1/2".
Step Three: Trim to the right of your sewn line. Then press open.
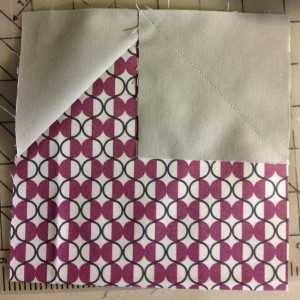
Step Four: Sew another background square to the next corner. Trim and press.
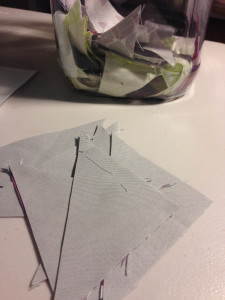
***Ideas to not waste material: I take the triangles which I cut off and save them, together so easy to grab and sew into a half square triangle. I use them when I need a scrap to be able to continue my strip piecing. I then put them into a clear jar and save them til I need lots of half squares triangles. Looking forward to the quilts I can make with these scraps.****
Step Five: Repeat process for the next two corners.
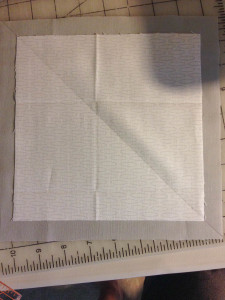
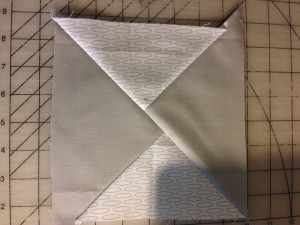
Step Six: We are now going to make 4 flying geese. I will show you the way which I make them to have as little waste as possible. Draw a diagonal line across your background 9" x 9" square and your light grey square 7 1/2" x 7 1/2". Place them on top of each other matching lines and centering as best you can eye balling it.
Step Seven: Sew 1/4" down along each side of the line which you drew. Then cut it down along the line you drew and press open.
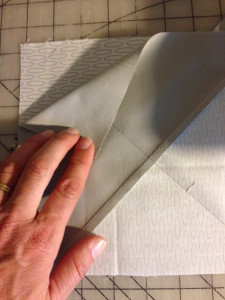
Step Eight: Place the two squares which you have just created on top of each other with the light grey on opposite sides of each other.
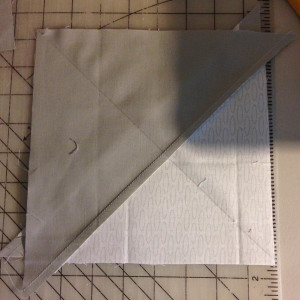
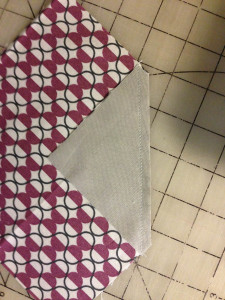
Step Nine: Draw a diagonal line as shown in the photos above. Sew a 1/4" line on each side of the line.
Step Ten: Cut along the line which you just drew and press open. It will look like this.
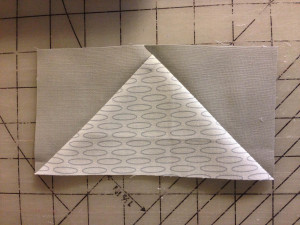
Step Eleven: You need to cut them apart. There are rulers that can help, but if you don't have a ruler you can cut it to the following dimensions. 6 1/2" x 3 1/2" rectangle Make sure that you place the point of the light grey pattern a 1/4" below your edge at the 3 1/4" from each edge. See picture below. Trim for all 4 of the flying geese that you made.
Step Twelve: Lay out your parts of the square to look like the finished block. Sew a 3 1/2" x 3 1/2" light grey square to a flying geese. Press seams. Repeat same thing. Sew a flying geese to your square you made at the being of this block. Press seams. Then repeat again to get the three strips of this block. Press seams. Then sew the three strips together to make this block.
Step Thirteen: Repeat this block 9 more times for a total of 10 block Two.
Putting the quilt together:
Layout the blocks in whatever order you like with 4 blocks wide by 5 blocks long. I choose to have alternating blocks and also making sure that each type of each block is only used one on each row.
Between the blocks you will be putting a sashing strip (2 1/2" x 12 1/2") and a cornerstone at each of the corners with in the quilt (not on the rows/columns which are outside it).
Sew the blocks and sashing between them to create 5 rows of blocks. Sew the sashing and cornerstone squares together into rows. Then sew the strips of blocks to the sashing/cornerstone strips. Continue to combine all the rows of blocks and strips of sashing/cornerstone.
I added a 3" border.
- Take the 3" x WOF and sew 2 together three times. Press seams.
- Then on one of them cut off 20" and sew it to the rememing 3" x WOF strip.
- Take one of the 3" x approx 60" strips to the top and bottom of the quilt. (cutting off the excess). press seams.
- Then take the two 3" x 80" strips to the sides of the quilts and trim off the extra. press seams
Your Quilt top is DONE!!!
You will now need to quilt it (top/batting/backing), bind it, wash it and then fall in love with it!!!
Love to see yours!
Kris
60" x 74" quilt prior to washing.
Kris Allen
{krisrunner.wordpress.com}

