Welcome to Moda Fabrics!
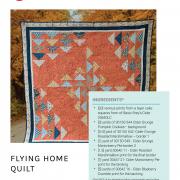
Flying Home Quilt
Flying Home Quilt
YIELD
76” square quilt
Made up of [4] 32-inch blocks, one 1-inch borders, one 2-inch border and a final 3-inch border.
INGREDIENTS
METHOD A (4 AT A TIME FLYING GEESE) CUTTING
[20] various prints from a layer cake squares from of Basic Brey’s Cider 30640LC
[3] yards of 30150-544 Cider Grunge Pumpkin Cookies– background
[3/4] yard of 30150 542 -Cider Grunge Roasted Marshmallo – border 1
[1] yard of 30150 549 - Cider Grunge Marionberry Pie-border 2
[1.5] yard 30640 11 - Cider Roasted Marshmallow print for the final border
[1] yard 30647 21- Cider Marionberry Pie print for the binding
[5] yards of 30642 16 - Cider Blueberry Crumble print for the backing
FROM 30150-544 Cider Grunge Pumpkin Cookies– background fabric, CUT:
* (6) 8.5” strips – sub cut into [16] 8.5” x 12.5’” rectangles
* (10) 5” strips – sub cut into [80] 5” squares
FROM THE 20 VARIOUS PRINT FROM A LAYER CAKE OF THE CIDER COLLECTION
*Trim the 20 prints into 9.25” squares
INSTRUCTIONS
STEP 1. MAKE [80] 4 AT A TIME FLYING GEESE
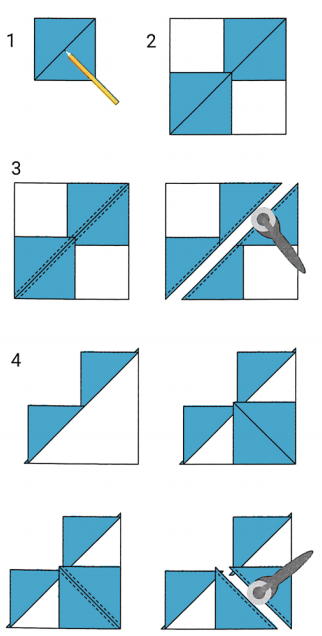
Draw a diangonal line from corner to corner on the wrong side of the [80] 5 inch background fabric squares.
Align two of the squares on opposite corners on one of the 9.25 inch print squares with right sides together.
Sew ¼ inch on each side of the drawn line. Cut along the drawn line to form two units. Press open.
Place a 5 inch square with a diagonal line drawn on the back with right sides together on the newly formed units so that the drawn line is going from the section of fabric pressed out to the corner of the unit (see the illustration below).
Sew ¼ inch on each side of the drawn line. Cut along the drawn line to form two units. Press open.
Trim the flying geese unit to 4.5” x 8.5”.
Repeat the above steps until you have a total of [80] 4.5” x 8.5” flying geese.
Note: There should be 4 flying geese of each print so that there is one print for each block.
STEP 2. ASSEMBLE THE BLOCK
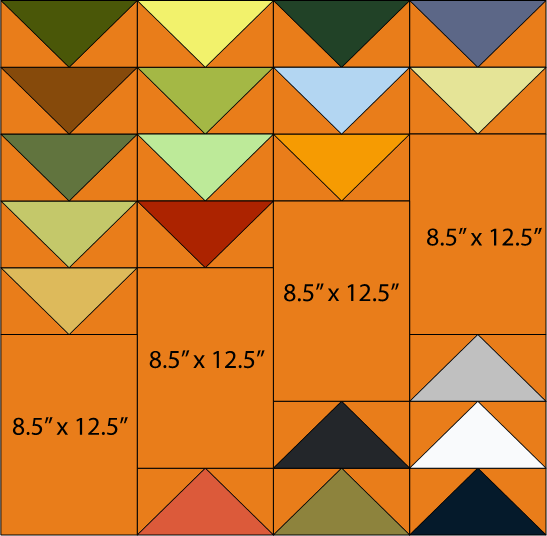
Make a total of 4 blocks that measure 32.5” unfinished.
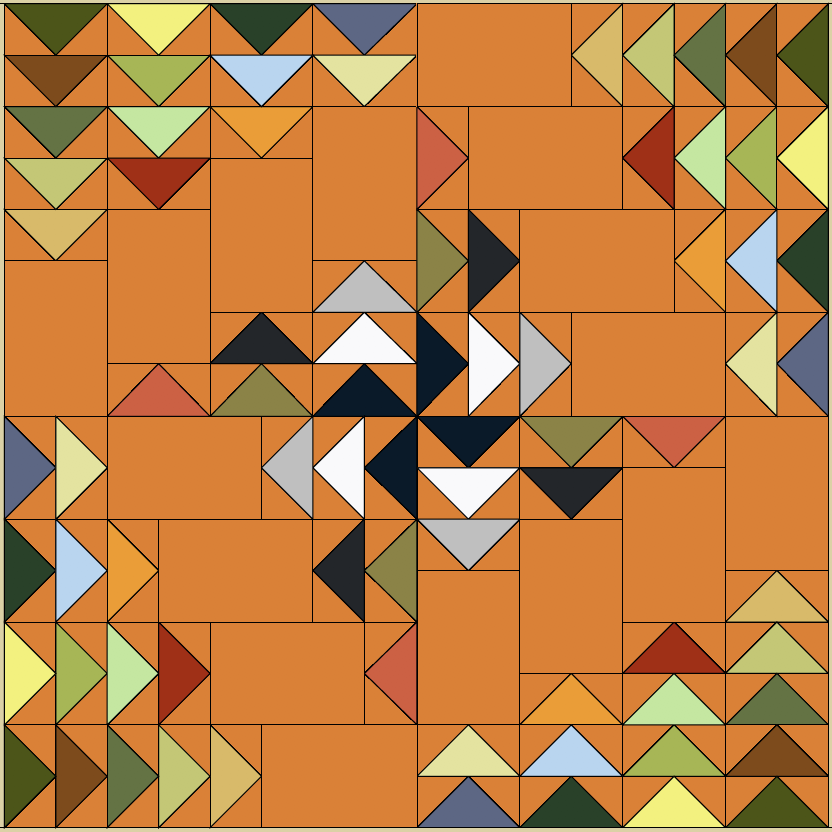
Each block will use [20] flying geese and [4] 8.5” x 12.5” rectangles. Refer to the illustration below to assemble your blocks. If desired, assemble each block the with the flying geese in the same places:
STEP 3. ASSEMBLE THE MAIN SECTION OF THE QUILT TOP:
Sew the four blocks together to form the main section of your quilt top with the three stack of flying geese in the center of the quilt. You will rotate each block counterclockwise to create the illusion the center flying out in four different directions.
The top should measure 64.5”.
STEP 4. CUT AND SEW ON THE BORDER PIECES
For the first border, from Cider Grunge Roasted Marshmallow fabric cut:
[2] 1.5” x 64.5” Strips (piece together as needed)
Sew onto the left and right of the quilt top.
[2] 1.5” x 66.5” strips (piece together as needed)
Sew onto the top and bottom of the quilt top
For the 2nd border, from 30150 549 - Cider Grunge Marionberry Pie-
[2] 2.5” x 66.5” Strips (piece together as needed)
Sew onto the left and right of the quilt top.
[2] 2.5” x 70.5” strips (piece together as needed)
Sew onto the top and bottom of the quilt top
For the 3rd border, from 30640 11 - Cider Roasted Marshmallow print
[2] 3.5” x 70.5” Strips (piece together as needed)
Sew onto the left and right of the quilt top.
[2] 3.5” x 76.5” strips (piece together as needed)
Sew onto the top and bottom of the quilt top
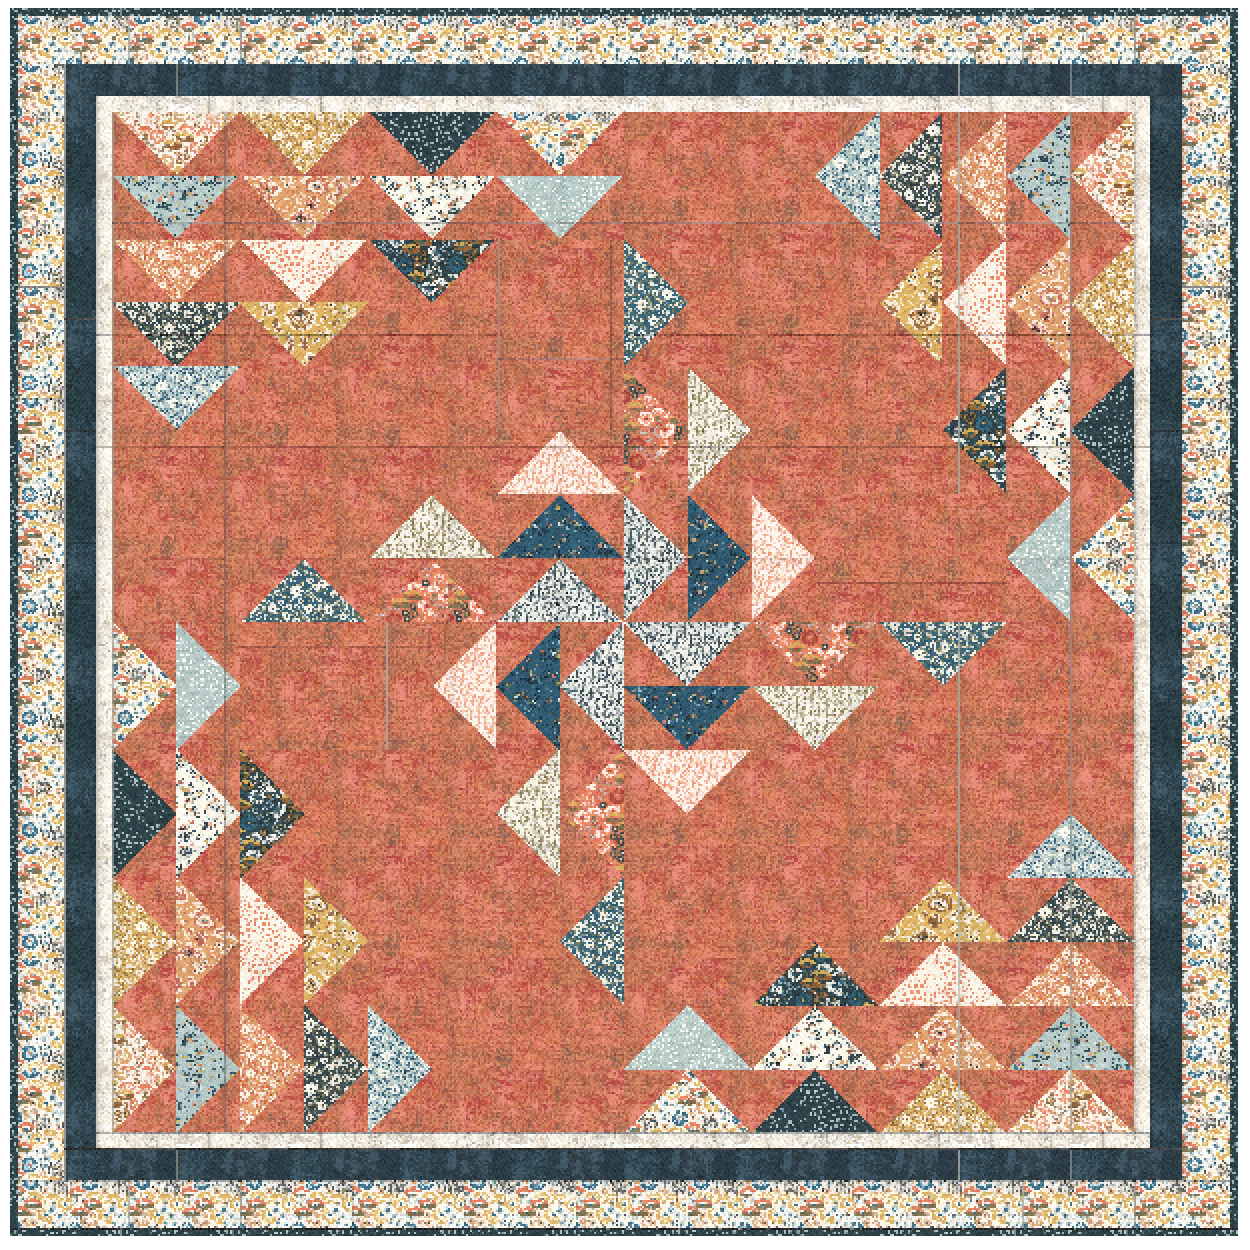
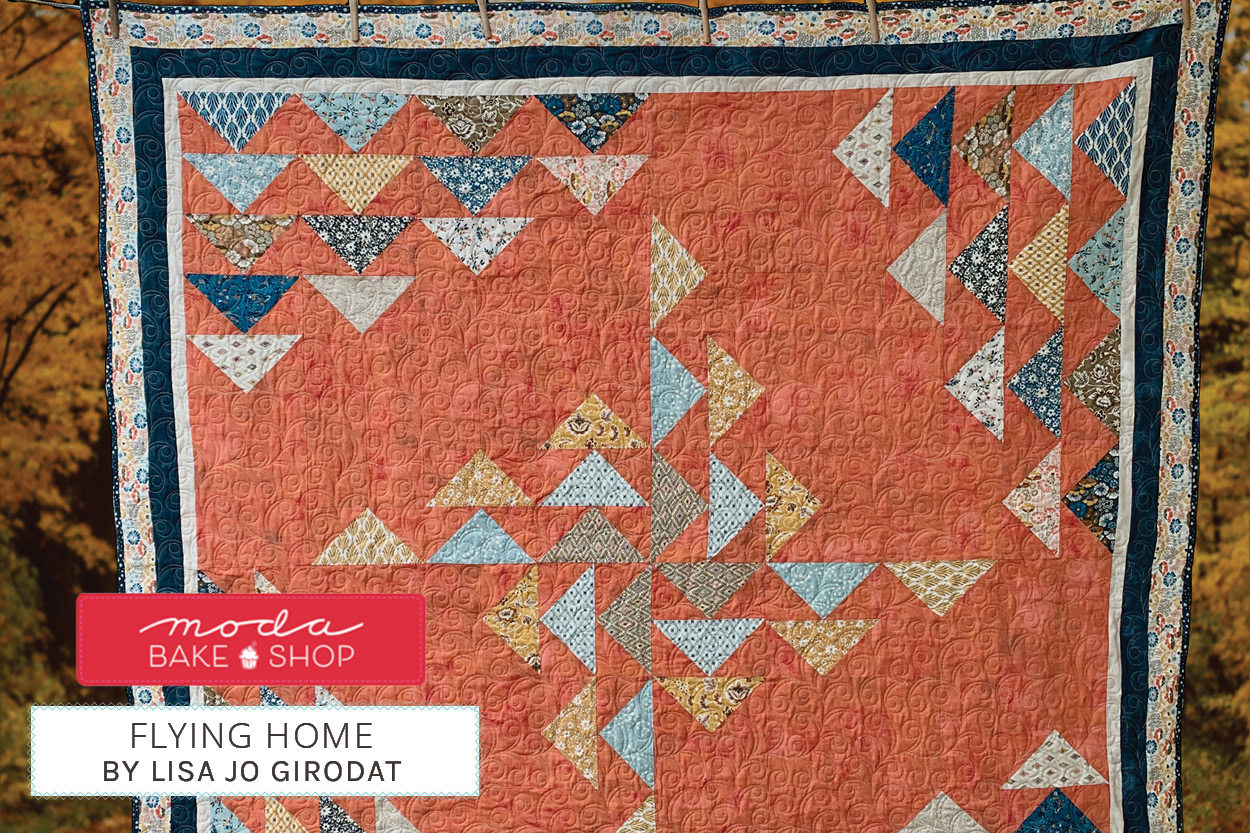
The quilt top should measure 76.5” square.
Quilt, bind, wash, snuggle and enjoy!!!
Lisa Jo Girodat
Neverland Stitches

Comments